How to renovate the table? Renovating a wooden table step by step

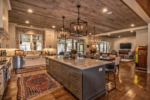
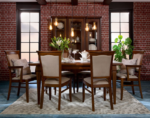
The fashion for vintage furniture is still going on, which is connected with the growing interest in second-hand furniture. Especially popular are old rustic tables, which are ideal for bold arrangements with modern or colourful chairs. However, before we put an old table into a flat, it is worth refreshing it, getting rid of not only a layer of long-lasting dirt but also pests and peeling paint or varnish. How to renovate an old wooden table made of plywood, veneered or covered with natural veneer? We present a step-by-step guide to renovating a table.
How to renovate an old wooden table?
There are two ways to refresh your wooden furniture. The first, the classic one involves taking an old layer of paint or varnish off the furniture and impregnating the wood with preservatives that do not cover the grain drawing. Varnish, wax or wood oil, for example, are best suited for this role. However, painting is becoming more and more popular, ensuring maximum coverage of individual wooden elements of a piece of furniture or even the entire table surface. Chalk or phthalic paints are most often used for such renovations. Although the final effect is diametrically different, in both cases the order of work is identical.
Step 1: Preparation for starting the work
Before you start renovating an old table, it is worthwhile to prepare the workplace and appropriate tools and preservatives for wood. It is extremely important to carry out renovation in a place where there is a constant supply of fresh air, e.g. in a room or garage with windows opening or in the open air. This is all the more important because during sanding, there will be fine particles of wood dust and old varnishes and paints in the air, and the smell of the chosen wood preservative may be irritating during painting.
To avoid accidental soiling of the floor, it is best to place cardboard or paint film in the place where the table stands. The next stage of preparation is to complete the appropriate tools, i.e. an oscillating or belt sander (if we have access to them) or sheets of sanding paper of different gradations or sanding cubes, which will work well in hard to reach places. Those with more manual skills can also use a specialist wood cycline. For painting, you can choose a brush or roller and a soft cloth for “polishing” as long as the wood is oiled or waxed. It is also worthwhile to put protective glasses and a protective mask for the mouth and nose on the shopping list.
Step 2: Removing the old layer of paint or varnish
One of the most important stages in the renovation of an old table is to thoroughly clean it from the old layer of paint, varnish or polish (if it was previously painted) or from a thin layer of gray wood (if it is made of so-called raw wood). If we want to perform a classic renovation, i.e. to expose the beauty of natural wood and emphasize the grain, it is necessary to completely remove the old layers of preservatives. If a piece of furniture is to be painted with opaque paint, only outgoing, crumbling or peeling paint fragments are removed.
It is best to use an oscillating sander, belt sander or sandpaper to remove the old paint. In the case of solid wood furniture, e.g. pine or oak tables, the first sanding is best done with paper with a grain size of approx. 100, gradually increasing it to approx. 200.
However, how to renovate a veneered table, a table with natural veneer and a plywood table? In such a situation it is necessary to be more careful and use much more delicate sanding paper granulations (at least 120). When sanding, be careful not to press the sander, sanding paper cube or sheet of sanding paper too much to make disfiguring holes in a thin layer of veneer or veneer. Focusing is especially required on the canvas of the tabletop. When we are dealing with furniture from the PRL era painted in the factory with the so-called oil paint (with characteristic and hardly removable brown primer) or with many layers of paint, it is worth taking an additional step during a renovation. Before sanding, it is best to remove the paint with a spatula, previously heating the tool with a wood-burner or using specialist chemicals available in construction shops.
Step 3: Dusting the table
After sanding the tabletop and legs, they should be dusted off thoroughly. It is best to use a clean sweeper, soft brush or hoover with a fine brush tip to prevent scratches on the freshly sanded surface. After dusting, the wood surface should be wiped with a soft cloth, e.g. cotton or flannel, slightly dampened (almost dry). If it is too moist, there is a risk that the wood fibres will “float” and you will have to sand the entire furniture again. You need to make sure that the wood is completely dry before you start working on it.
Step 4: Pest removal from wooden furniture
Some of the old furniture may be infected by wood pests, such as common drains, house knockers or striped woodcutters. If you can see fresh traces of wood on cleaned wooden furniture (e.g. light holes with a small diameter from which wood flour is spilt), it is worth using appropriate chemicals. Otherwise, there is a risk that pests will infect other wooden elements in the house, e.g. furniture and rafter framing.
It is best to use insecticidal wood preservatives available in building shops to remove wood pests. The agent is applied to the surface of the wood with a brush and then the table is tightly wrapped with foil and left for at least 24-48 hours (according to the manufacturer’s guidelines). In the case of veneered furniture, with natural veneer or plywood, it is best to find out in advance whether the product is suitable for this type of treatment by carefully reading the leaflet or label.
Step 5: Replenishing cavities with wood filling compound
If there are holes in the table wood from wood pests, holes from nails, cracks, cracks or large cavities (e.g. due to mechanical damage), it is best to fill them with wood filling compound. Its shade should be matched to the final colour of the table – if we plan to stain wood in the dark, the putty should have a similar colour. When painting with opaque paints, you can afford to use light putty, which reduces the risk that a darker putty will emerge from under the light paint layer. Mudding should be done according to the manufacturer’s guidelines, i.e. apply a thin layer on the wood, and after it has dried out – sand it and dust it off.
Step 6: Wood maintenance
The last stage of the renovation of a wooden table is wood preservation. Various means can be used to protect the wood from factors such as moisture, sunlight or heat. The most commonly used in amateur renovations are stains and varnishes (or finished lacquers) or wood oils. For opaque painting, the use of chalk paint with a simultaneous surface finish of wood wax or the use of acrylic paint is becoming increasingly popular.
Painting is best done with a small brush or a small paint roller with bristles adjusted to the specific paint (synthetic or natural). Both painting and varnishing may require the application of several layers of preservative product. In this case, the drying time specified by the manufacturer on the packaging should be carefully observed. When oiling wood, use special wood oils and apply them with a natural bristle brush. After the oil penetrates into the wood, the excess oil is removed with a soft cloth.